Spatial Scale Calibration
For calibrated objects, measurements are displayed in millimeters, square millimeters, cubed millimeters or other standard units set in the Preferences dialog. For images, regions of interest, multi-ROIs, and meshes that are not calibrated, you can use spatial scale calibration to update spacing and obtain the correct values. To perform a calibration, the object should include a fiducial marker that indicates its exact length or contain an object of known dimensions.
- Open the uncalibrated image, region of interest, multi-ROI, or mesh.
- Zoom-in on the fiducial marker or object of known dimensions in a 2D or 3D view, recommended.
Note You can remove image interpolation to better view the edges of the marker or object in 2D views. To do so, choose Interpolation > Nearest in the 2D settings box on the Data Properties and Settings panel.
- Select the Ruler tool and then draw a line that is exactly the same length as the marker or object (see Using the Ruler Tool).
- Right-click the object you need to calibrate in the Data Properties and Settings panel and then choose Calibrate Spatial Scale in the pop-up menu.
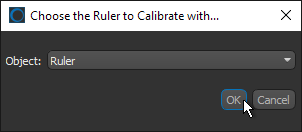
- Choose the required ruler in the Choose the Ruler to Calibrate With dialog and then click OK.
- Enter the known length of the ruler in the Expected Length of Chosen Ruler dialog and then click OK.

For images, regions of interest, and multi-ROIs, spacing is updated automatically (see Image Properties). You can also view the updated width, height, and depth in the Basic properties box on the Data Properties and Settings panel (see Basic Properties).
For meshes, you can view the updated X, Y, and Z sizes in the Information box on the Data Properties and Settings panel (see Information).
